You’re holding a precious object, perhaps a photograph, a historical document, or even a beloved book. You want to capture it, to freeze that visual moment in time with the utmost fidelity. In the digital age, where autofocus reigns supreme, the idea of analog focus tracking might sound like a relic from a bygone era. But for those who appreciate the tactile, the meticulous, and the deeply satisfying, there exists a method, a bedrock of precision that predates silicon chips and blinking LEDs: the Paper Method. This isn’t about flashy technology; it’s about understanding the fundamental mechanics of light and distance, a skill honed through observation and a deep appreciation for the physical world.
When you delve into analog photography, or even when you’re simply trying to achieve unparalleled sharpness in a high-stakes macro shot with a manual focus lens, you’ll encounter the need for precise focusing. Autofocus, while convenient, can be a capricious beast, especially in challenging lighting or with low-contrast subjects. It can hunt, it can miss, and it can misunderstand your intentions. The Paper Method, conversely, is your steadfast ally, your unerring guide to obtaining absolute, razor-sharp focus. It’s not just a technique; it’s a philosophy, a commitment to understanding how a lens bends light to form an image and how to perfectly align that convergence point with your desired plane of focus.
Imagine your camera’s lens as a sculptor’s chisel. Autofocus is like an automated sculpting machine, which can be surprisingly effective but sometimes lacks the nuanced touch of a master craftsman. The Paper Method, on the other hand, is you, the craftsman, with your own hands, feeling the texture of the marble, understanding its grain, and guiding the chisel with intention and practiced skill. It’s about feeling the distance, measuring it, and making the adjustment with a confidence that comes from direct engagement. You’re not relinquishing control; you’re taking it, fully and deliberately.
This article will guide you through the intricacies of the Analog Focus Tracking: Paper Method. We will break down its components, explain its application, and explore its enduring relevance in a world that often seems to rush past the very foundations of craft. You will learn to see the world through a different lens, or perhaps more accurately, to understand the mechanics of the lens as a sophisticated instrument of perception.
Before you can effectively employ the Paper Method, you must first grasp the fundamental principles that govern how a lens creates an image. Think of it as understanding the basic grammar of photography before attempting to write a novel.
The Lens as a Light Gatherer
Your camera’s lens is not merely a piece of glass; it is a carefully engineered system designed to collect light rays from the external world and converge them onto a specific point – the sensor or film plane within your camera. This convergence is what forms the image you see.
Refraction: The Bend of Light
The magic of a lens lies in the principle of refraction. As light rays pass from one medium to another (in this case, from air to glass and back to air), their direction changes. Convex lenses, the type most commonly found in photographic lenses, are designed to bend parallel light rays inwards, converging them at a focal point.
The Role of Lens Curvature
The degree to which light is bent, and therefore where the focal point lies, is determined by the curvature of the lens elements. Multiple lens elements are used in modern lenses to correct for various optical aberrations and to achieve the desired focal length and aperture.
Understanding Focal Length
Focal length, typically measured in millimeters, is a crucial parameter. It dictates the angle of view (how wide or narrow your scene appears) and, importantly for focusing, influences the distance between the lens and the film plane when focused at infinity. A longer focal length generally requires a greater distance between the lens and the sensor for distant objects, and vice-versa for close objects.
The Plane of Focus: Where Sharpness Resides
When you focus your camera, you are essentially adjusting the distance between the lens elements and the sensor to ensure that light rays from a specific distance in your scene converge precisely on the sensor’s surface. This specific distance defines the plane of focus.
Depth of Field: The Zone of Acceptable Sharpness
It’s vital to distinguish the plane of focus from the depth of field. The depth of field is the range of distances, both in front of and behind your perfectly focused subject, that appear acceptably sharp in the final image. This is influenced by aperture, focal length, and the distance to your subject. While a shallow depth of field can be used artistically to isolate a subject, the Paper Method focuses on achieving absolute sharpness at the intended plane of focus, regardless of the depth of field.
Aperture’s Influence on Depth of Field
A wider aperture (smaller f-number like f/1.8) results in a shallower depth of field, meaning less of the scene will be in sharp focus, and only a narrow slice will be perfectly rendered. Conversely, a narrower aperture (larger f-number like f/16) increases the depth of field, bringing more of the scene into acceptable sharpness.
The Physical Movement of Focusing
Focusing your lens involves physically moving the lens elements closer to or further away from the sensor. This movement alters the point at which light rays converge. When you turn an autofocus lens or a manual focus ring, you are precisely controlling this physical displacement.
If you’re looking for effective ways to track your analog focus minutes on paper, you might find the article on productive strategies at Productive Patty particularly helpful. This resource offers insightful tips and methods for maintaining focus and enhancing productivity through analog tracking techniques. To explore these strategies further, you can read the article here: Productive Patty.
The Paper Method: A Tactile Approach to Precision
The Paper Method, at its core, is a technique that leverages a physical object – a piece of paper – to achieve unequivocally sharp focus. It bypasses the sometimes-imprecise visual cues of a camera’s viewfinder or live view and grounds the focusing process in a tangible measurement.
Preparing Your Focus Target
The “paper” in the Paper Method is not merely a casual prop; it’s your meticulously prepared target. Its properties are crucial for accurate focusing.
Choosing the Right Paper
The ideal paper for this method is one with a discernible texture and contrast. A plain white sheet of printer paper might work in a pinch, but paper with a slight tooth or a subtle pattern will provide a more defined edge for your lens to latch onto. Think of a textured art paper or even the subtly printed lines of a ruled notepad if you’re focusing on text.
Brightness and Contrast Matters
Your target needs to offer something for the lens to “see.” A perfectly uniform, untextured surface will offer no distinct features to focus on, rendering the method ineffective. You’re looking for areas of transition – where light meets shadow, or where one color meets another.
Creating a Suitable Target Object
You can use a simple piece of paper as your target, but for greater efficacy, consider creating a small, portable target. This could be a card with a clear, high-contrast image or text printed on it. The key is to have a definable edge or detail that will be the precise point you want to render as sharp.
The Importance of a Fine Line or Edge
A fine black line on a white background, or a sharp black-on-white text character, provides an excellent point of reference. This is because the transition from black to white is very abrupt, and a lens can accurately determine where this transition occurs in sharp focus.
The Focusing Procedure
This is where the physical nature of the Paper Method truly shines. You’re not relying on your eyes and a viewfinder alone; you’re using a physical proxy for your subject.
Positioning the Paper: The Crucial Step
Place your prepared paper target at the exact distance you wish to be in focus. This is paramount. If you are photographing a person’s eyes, the paper should be positioned precisely where their eyes will be when you take the shot. If you’re capturing a product, the paper should be at the same distance as the critical feature of that product you want to be sharp.
Simulating the Subject’s Plane
Think of the paper as a stand-in for your actual subject. It acts as a placeholder, a physical representation of the exact focal plane you need to achieve. Misplacing this paper target is akin to a painter misplacing their easel – the entire composition can be thrown off.
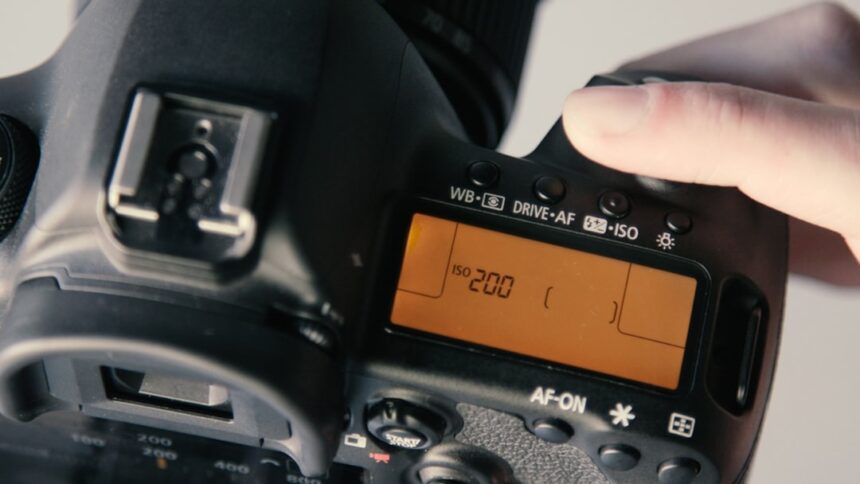
Manual Focus Engagement
With your camera set to manual focus (this is non-negotiable for this method), bring your eye to the viewfinder or use your live view screen. Begin adjusting the focus ring.
Slowly and Deliberately Adjusting the Ring
Turn the focus ring slowly and deliberately. You are looking for the point where the texture or edge on your paper target appears absolutely sharpest. It’s a subtle dance, a gentle negotiation between your hand and the lens.
Identifying the Sharpest Point
As you turn the focus ring, you will observe a moment when the details on the paper snap into exquisite clarity. This is the “sweet spot.” Don’t settle for “almost sharp.” You are striving for absolute, unwavering definition.
Verifying Sharpness with the Paper
This is the defining characteristic of the Paper Method. Once you believe you have achieved focus, remove the paper (or ensure your camera is positioned so the paper is at the subject’s distance and you’re ready to shoot your actual subject). Ideally, you would photograph the paper itself as a test.
Magnification for Fine-Tuning
For even greater accuracy, especially in critical situations, use your camera’s live view and zoom in on the paper target. This magnification allows you to see minute details and ensure that the focus is truly spot-on. You’re not just looking; you’re scrutinizing.
The “Snap” of Focus
You’ll know you’ve hit it when the image on the paper seems to “snap” into focus. It’s a moment of visual revelation, where fuzzy lines become crisp edges.
Beyond the Viewfinder: Live View and Magnification
While the viewfinder has been the traditional window into the photographic world, modern cameras offer the powerful tool of live view. This capability, combined with magnification, elevates the precision of the Paper Method to new heights.
Leveraging Live View for Enhanced Accuracy
Live view displays a real-time image from your camera’s sensor onto the LCD screen. This is a significant advantage over the optical path of a viewfinder, as it directly shows you what the sensor is seeing.
Direct Sensor-Level Visualization
The live view feed is a direct representation of the light hitting your sensor. This means that any focusing adjustments you make are immediately reflected on the screen, allowing for a more accurate assessment of sharpness.
Comparing Viewfinder vs. Live View
The optical viewfinder presents an image that has passed through various elements, including focusing screens, which can introduce subtle differences. Live view, by showing a direct feed from the sensor, eliminates these potential discrepancies and offers a truer representation of the final image’s focus.
The Power of Digital Magnification
When used in conjunction with live view, digital magnification allows you to enlarge a specific area of your live view image. This is an indispensable tool for fine-tuning focus on your paper target.
Zooming in on the Details
With your paper target in place, engage live view and then use the magnification function to zoom in on the fine details of your target. You can often zoom in multiple steps, allowing for an incredibly detailed inspection of the sharpness.
Identifying the Precise Plane
By zooming in, you can clearly distinguish between areas that are just slightly out of focus and those that are perfectly sharp. This is where the Paper Method truly excels, as you can visually confirm the exact plane where the image is at its crispest.
The “Pixel Peeping” Advantage
While generally discouraged for artistic interpretation, “pixel peeping” – scrutinizing individual pixels for sharpness – becomes a strategic advantage when using the Paper Method with live view magnification. You are, in essence, looking at your focus at the pixel level.
Applications and Situations Where the Paper Method Excels
While autofocus has become ubiquitous, there are numerous scenarios where the Paper Method proves not just useful, but essential for achieving photographic perfection.
Macro Photography: The Realm of Extreme Sharpness
Macro photography is the art of capturing extreme close-ups of small subjects. In this genre, depth of field is typically very shallow, making precise focus absolutely critical.
Tiny Subjects, Tiny Tolerances
When you’re photographing an insect’s eye or the delicate structure of a flower petal, even a slight miscalculation in focus can render your subject soft. The Paper Method provides the necessary precision to nail these critical shots.
Focusing on Specific Details
In macro, you’re often not just focusing on the entire subject, but on a very specific part – the pupil of an eye, the tip of a stamen. The Paper Method allows you to place your paper target precisely at that critical point.
Working with Uncooperative Subjects
Many macro subjects, especially living creatures, are not going to stay perfectly still. The Paper Method, used before the subject is in place, allows you to pre-focus accurately, so when your subject finally cooperates, you’re ready to capture the shot.
Low Light Photography: When Autofocus Struggles
Autofocus systems rely on contrast to function. In low-light situations, contrast is often diminished, causing autofocus to hunt, struggle, and ultimately fail.
The Limitations of AF in the Dark
When the available light is scarce, your camera’s autofocus will have a harder time finding a lock. The Paper Method, being a manual process, is immune to these low-light challenges.
Creating Your Own Contrast
Even in low light, you can use your paper target with a strong imprint or even illuminate it subtly with a small LED or a distant light source to create the necessary contrast for your manual focus adjustment.
Subjects with Minimal Contrast or Texture
Some subjects, by their very nature, lack distinctive features. A smooth, monochromatic wall, for example, can be a nightmare for autofocus.
The Challenge of Uniform Surfaces
Autofocus systems will often struggle to find a definitive point to lock onto when faced with large areas of uniform color and texture. This is where the Paper Method, by introducing a defined edge or pattern on your paper target, overcomes this limitation.
Focusing on the “Edge” of Nothing
You are essentially using your paper target to teach the lens where the “edge” is, even if the surrounding scene offers no such definition.
Achieving Uncompromising Technical Sharpness
For photographers who prioritize absolute technical perfection, whether for scientific documentation, forensic photography, or simply the pursuit of ultimate image quality, the Paper Method is a non-negotiable tool.
The Pursuit of Purity
While many visual cues can be subjective, the sharpness of a line or an edge on a finely rendered image is objectively measurable. The Paper Method allows you to achieve that objective standard.
Eliminating Variables
By controlling focus manually and with such precision, you eliminate one of the most common sources of image degradation – inaccurate focus.
If you’re looking for effective ways to track your analog focus minutes on paper, you might find it helpful to explore a related article that delves into various techniques for enhancing productivity. This resource offers insights into different methods of time management and how to implement them in your daily routine. For more information, you can check out this informative piece at Productive Patty, which provides practical tips to help you stay focused and organized.
Mastering the Art and Evolving Techniques
| Metric | Description | Tracking Method | Example |
|---|---|---|---|
| Start Time | The exact time when you begin your focused work session | Write down the time on paper at the start of the session | 9:00 AM |
| End Time | The exact time when you finish your focused work session | Write down the time on paper at the end of the session | 9:25 AM |
| Duration (Minutes) | Total minutes spent in focused work | Calculate difference between end time and start time and note it | 25 minutes |
| Task Description | Brief description of the task worked on during the focus session | Write a short note about the task on paper | Writing report draft |
| Distractions | Number or type of distractions encountered during the session | Make a tally or note distractions on paper as they occur | 2 phone calls |
| Focus Quality | Self-rated quality of focus during the session (e.g., scale 1-5) | Rate focus quality on paper after session ends | 4/5 |
| Notes/Comments | Additional observations or reflections about the session | Write any relevant notes on paper | Felt productive, but distracted by noise |
The Paper Method isn’t a static technique; it’s a foundation upon which further refinement can be built. As you become more adept, you’ll discover nuances and personal adaptations.
Refining Your Technique Through Practice
Like any skill, the Paper Method requires practice to master. The more you use it, the more intuitive and instinctive it becomes.
Developing a Feel for the Focus Ring
With time, you’ll develop a tactile understanding of your lens’s focus ring. You’ll learn how much to turn it to achieve a certain shift in focus, becoming a sort of “focus whisperer.”
Experiencing the “Sweet Spot” Repeatedly
The more you experience that moment when the image snaps into focus, the better you’ll become at recognizing and achieving it. It’s a muscle memory for your hands and eyes.
Adaptations and Hybrid Approaches
While the core “paper” method involves a physical sheet, the underlying principle of using a precisely placed target can be adapted.
Using Integrated Focus Aids
Some cameras and lenses offer built-in focus aids like focus peaking, which highlights in-focus areas with colored overlays. These can complement the Paper Method, especially when used in conjunction with your paper target.
Focus Peaking as a Secondary Check
While you’re focusing on your paper target, focus peaking can act as a visual confirmation. However, the Paper Method’s tactile and visual precision through magnification generally surpasses the broader highlights of focus peaking on its own.
The “Digital Paper” Concept
In some advanced scenarios, particularly with specialized lighting setups, a projected pattern or a precisely calibrated digital display can act as a highly accurate “digital paper” target, offering an even more controlled environment for focusing.
Beyond the Single Plane: Advanced Focusing Strategies
While the Paper Method excels at defining a single plane of focus, photographers often need to manage focus across a different depth or area.
Understanding Hyperfocal Distance
While the Paper Method focuses on a specific distance, understanding hyperfocal distance allows you to maximize the depth of field. This is often achieved through careful aperture selection and a precise understanding of where to focus to keep the greatest expanse of your scene sharp.
Combining Manual Focus with Depth of Field Calculations
Once you’ve used the Paper Method to establish absolute sharpness at a critical point, you can then adjust your aperture to control your depth of field, ensuring that everything from your intended near-focus point to infinity is acceptably sharp.
Focus Stacking for Extreme Depth
For subjects requiring extreme depth of field that even hyperfocal distance can’t fully achieve, focus stacking is employed. This involves taking multiple shots, each focused at a different distance, and then digitally merging them. The Paper Method is the crucial first step in ensuring each individual shot in a focus stack is perfectly sharp.
The Enduring Value of Analog Focus Tracking
In an era dominated by the seemingly effortless convenience of autofocus, the Paper Method might appear to be a curious anachronism. However, its value lies not in its modernity, but in its timeless adherence to fundamental principles and its ability to empower the photographer with absolute control.
Reclaiming Control in a World of Automation
Autofocus has undoubtedly revolutionized photography, making certain types of shots more accessible. Yet, it can also foster a passive reliance on technology, diminishing the photographer’s direct engagement with the image-making process. The Paper Method is an active reclaiming of that control.
The Satisfaction of Mastery
There is a profound sense of accomplishment that comes from executing a technically perfect photograph through meticulous manual effort. The Paper Method is a pathway to that satisfaction.
Your Eye, Your Hand, Your Focus
You are the ultimate arbiter of focus. Your eye, guided by practice and your hand, precisely controlling the lens – this is the essence of analog craftsmanship.
A Testament to Mechanical Precision
In a world increasingly defined by intangible digital data, the Paper Method celebrates the elegance and reliability of mechanical precision. The smooth glide of a well-lubricated focus ring and the physical movement of lens elements are a testament to engineering at its finest.
The Tangible Interaction
You are not merely pressing a button; you are interacting with a finely tuned mechanical instrument. This tactile engagement enriches the photographic experience.
Reliability Where Digital Fails
While digital systems are powerful, they are also susceptible to glitches, software errors, and atmospheric interference. A well-maintained manual focus lens, used with the Paper Method, is a remarkably reliable tool.
The Foundation for Advanced Photographic Skills
Mastering the Paper Method is not just about achieving sharp focus for a single shot. It’s about building a deeper understanding of optics, light, and the mechanics of your camera. This knowledge forms the bedrock for developing more advanced photographic skills.
Understanding the “Why” Behind the “How”
By engaging with manual focus, you begin to understand why certain apertures give you more depth of field, why longer lenses behave differently, and why autofocus can sometimes be fooled. This knowledge is invaluable.
Elevating Your Photographic Vision
When you have absolute confidence in your technical execution, your creative vision can flourish. You are free to concentrate on composition, lighting, and storytelling, knowing that your focus is already perfectly handled.
In conclusion, the Analog Focus Tracking: Paper Method might demand more of your attention and patience. But in return, it offers a level of precision, control, and a deeply satisfying connection to the craft of photography that is increasingly rare. It is a reminder that sometimes, the most advanced solutions are those that are the most fundamentally sound. You are not just taking pictures; you are engaging in a dialogue with light, distance, and the very essence of how an image is formed.
STOP Your Dopamine Drain: The 24-Hour Reset
FAQs
What are analog focus minutes?
Analog focus minutes refer to dedicated periods of time spent concentrating on tasks without the use of digital devices, often tracked manually on paper to improve productivity and minimize distractions.
Why track focus minutes on paper instead of using digital tools?
Tracking focus minutes on paper can reduce screen time, eliminate digital distractions, and provide a tangible, visual record of productivity that some people find more motivating and easier to manage.
How do you set up a paper system to track analog focus minutes?
To set up a paper tracking system, you can create a simple chart or log with columns for date, start time, end time, and total focus minutes. You can also include notes or task descriptions to monitor progress and patterns.
What are some tips for accurately tracking focus minutes on paper?
To track focus minutes accurately, start and stop your timer or note the time immediately when beginning and ending a focus session, avoid multitasking during the session, and review your log regularly to assess productivity trends.
Can tracking analog focus minutes on paper improve productivity?
Yes, tracking focus minutes on paper can increase awareness of how time is spent, encourage consistent focus sessions, and help identify distractions or inefficiencies, ultimately leading to improved productivity.